Repair Workshop
Feb 2, 2020
Attendees:
- Chet Dickerson
- Larry Sakayama
- Howard Wilson
- Steve Clark
- Kenny Craft
- David Motley
- Dennis McKim
Click on any image to start the slide show.
Intonation Issue
Steve Clark brought his Sigma (by Martin) C9-R classical guitar S/N 0020 circa 1980 for comparison to the Truetone. He was evaluating an intonation issue on the Sigma. The high E string would fret flat at, for example, the 12th fret. The issue seemed limited to the high E string whereas the other 5 strings seemed to hold intonation when fretted.
Neck issue? Not to the marginally trained eye of the guitar owner. Humidification changes? One might expect issues with more than one string if that were the case. This guitar had not been played much in the last decade and the strings were likely at least 10 years old. So old strings were suspected even though this idea might defy common notions about how materials behave. In any case, the high E string was replaced on the Sigma using a replacement from a new set of D’Addario Pro-Arte’ EJ45C normal tension strings (the “C” stands for “Composite Core” on the lower strings) and, surprise, this solved the intonation issue with this string.
Misc
David Motley asks:
How many luthiers...?
does it take to carve a guitar neck?
Ans: 8. 1 to carve, 4 to hold the assembly steady, 2 to monitor with shape templates, and 1 to gauge with the calipers!
Next up - the Silvertone
Initial assessment-
Silvertone, model 605, circa 1950s-1960s, number stamped on inside back plate 4995H605, 12- fret, ladder braced top, floating bridge with tailpiece, some warpage on back plate,
Ebony fretboard, Ebony nut, brass frets, solid headstock with no tuner bushings, needs neck reset
Much debate about what to do with the back which suffers from delamination due to age or perhaps exposure to water. A neck reset is also contemplated.
And Beyond
The Gibson LG-0
Initial assessment-
Gibson, LG-0, S/N on neck block S1443 12, circa 1959, 14-fret, all mahogany (top, sides, back, neck), ladder braced, missing half of back plate, no tuners, bridge and pick guard are off,
numerous top cracks, broken tail block, good candidate for X-brace conversion, likely crash victim
Some background on the Gibson model is found here.
A preview of the direction the group might take with the Gibson might be implied in these web findings:
1962 Gibson LG-0 Bracing Conversion
1949 Gibson LGO Rebracing
As suggested earlier, the notion is to convert this guitar to X-bracing. This guitar was literally headed for the trash before Chet was able to get his hands on it. It’s good to be reminded it is a rescue/salvage project. The gears are missing, half the back is gone, and it has numerous cracks in the top and cracks in the half back. The finish is roached! Even so, we are determined to return this Gibson to service. It promises to demonstrate nearly every aspect of guitar repair.
Misc


Chet's shop in Roanoke, VA
(Notes: Steve Clark and Chet Dickerson. Photos: Steve Clark, Chet Dickerson, Howard Wilson and Larry Sakayama)
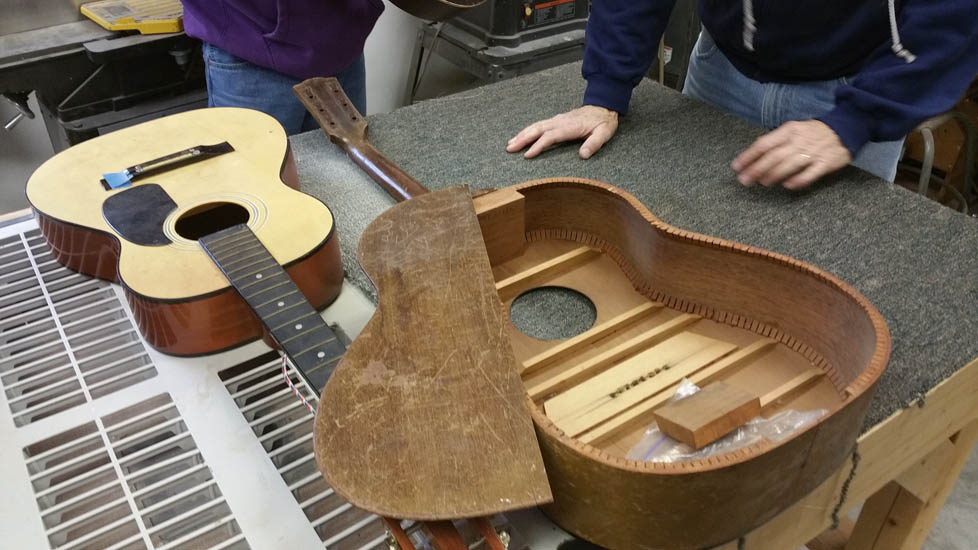
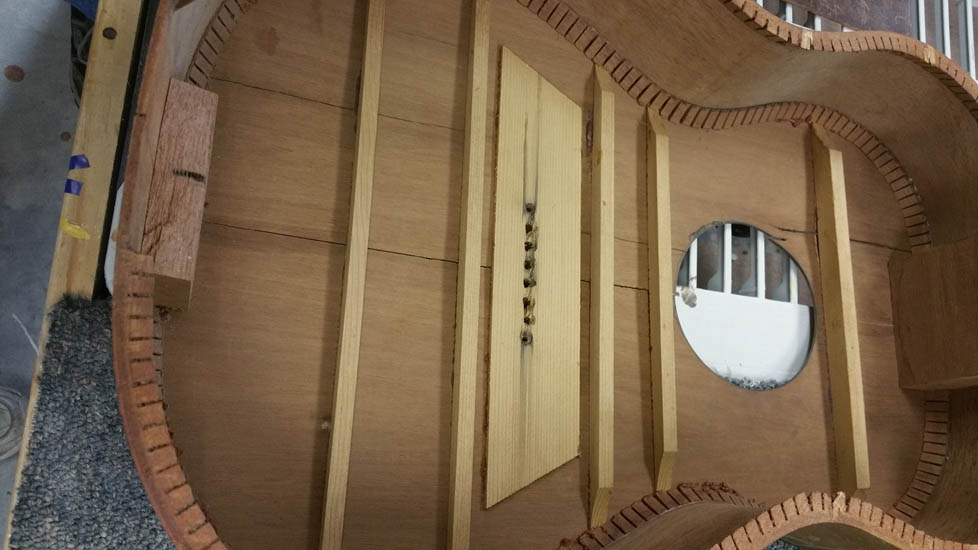
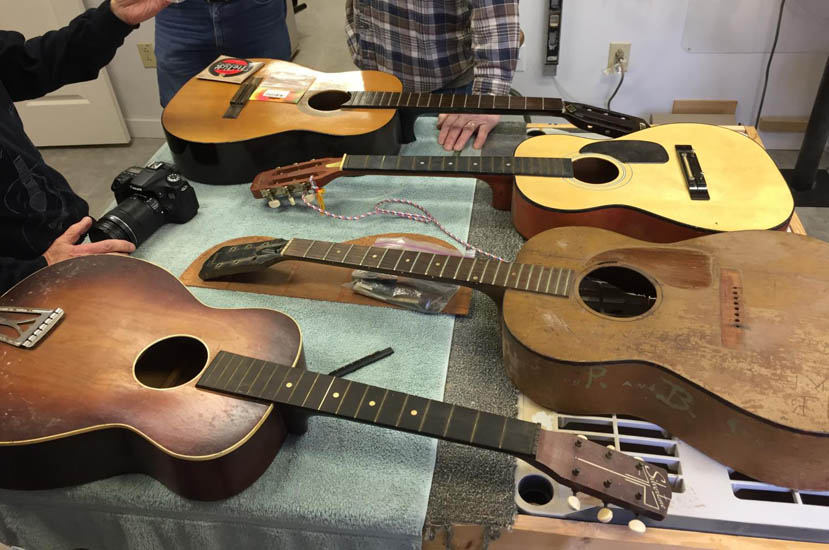
This day efforts were focused on finishing the Truetone classical guitar and taking the next steps on the Harmony ¾ parlor guitar. Near the end we discussed plans for the Silvertone and Gibson. See the Jan. 18 notes for description of starting condition of all guitars, but this image captures the executive summary:
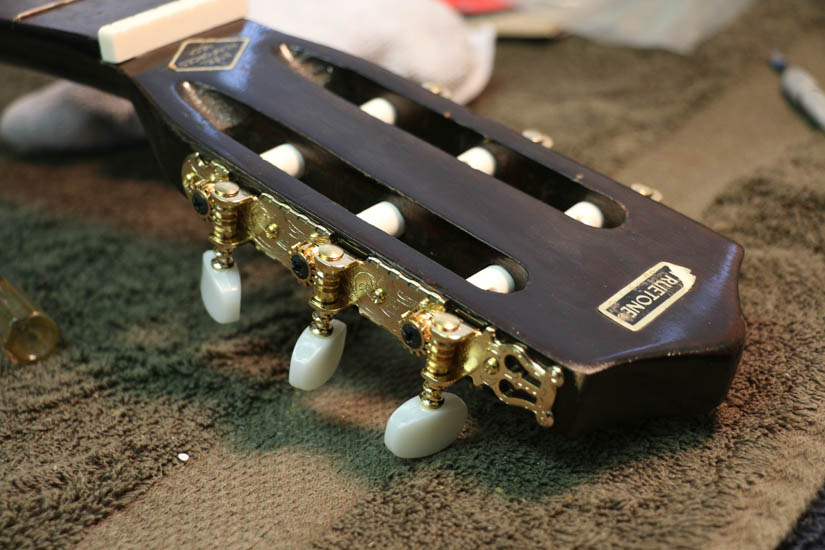
The Truetone Classical Guitar
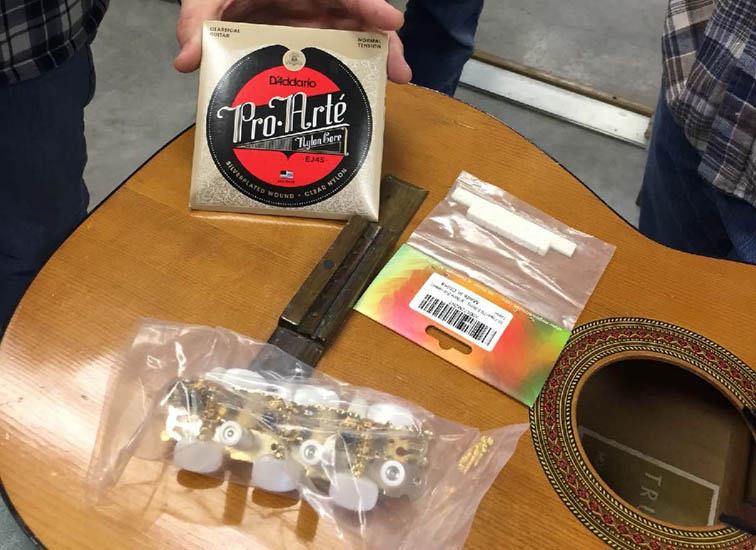
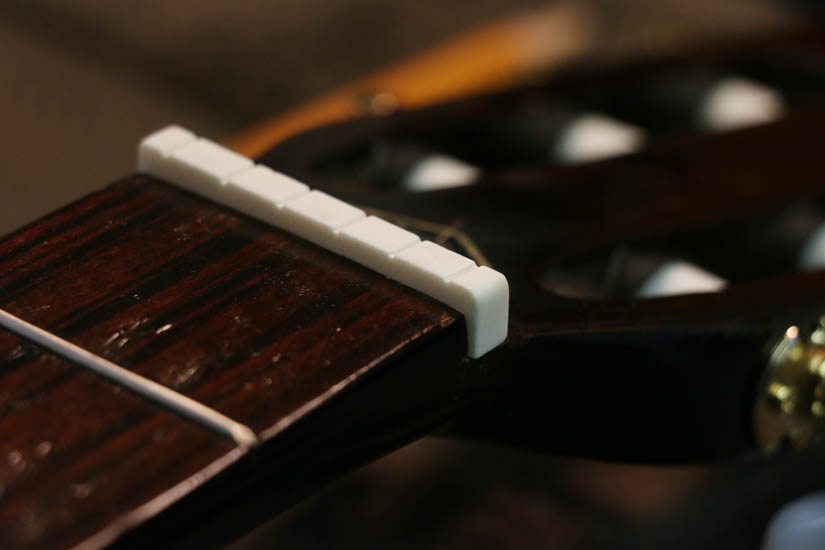
New tuners, nut, saddle, and strings were bought for this guitar. We think the nut and saddle are bone unless something was lost in translation. Both the nut and saddle required fitting to the guitar.
The screw holes for new tuners were not in the same place as the original tuners so new holes had to be drilled. Then the tuners were installed.
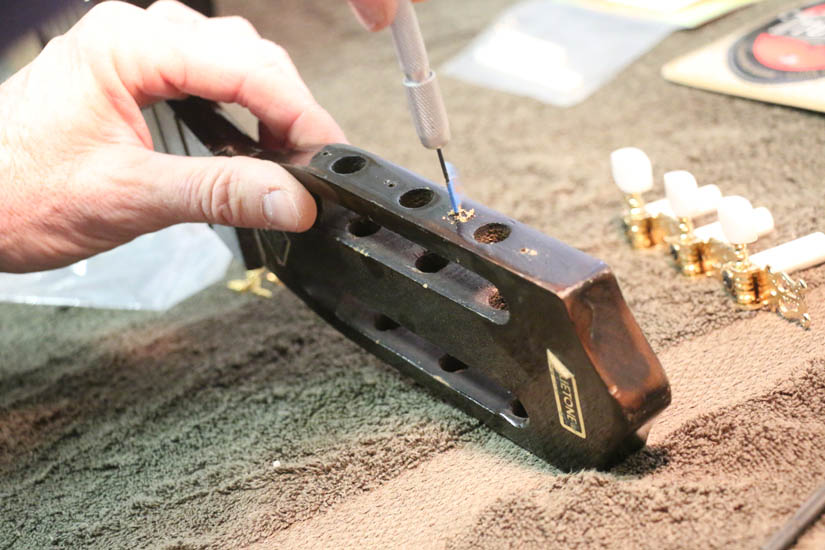
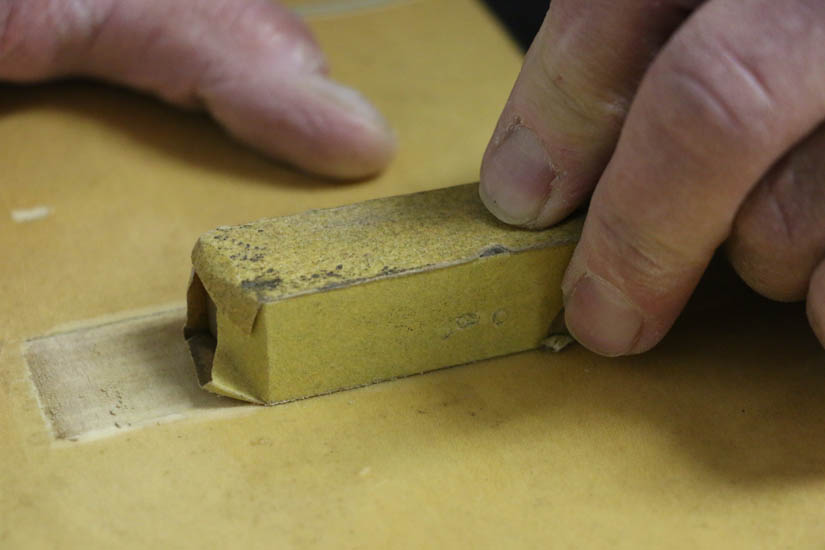
The saddle was thick for that slot and so was meticulously sanded on fine grit (~220 to 320) paper taped to a marble surface plate (counter top material); the technique was to sand a little, trial fit, sand a little more, trial fit, etc. sneaking up on a light interference fit with the bridge. Also had to adjust to assure then center of the saddle was thinning the same as the ends.
The nut was trial fit as well. Initial sizing consisted of getting the width correct.
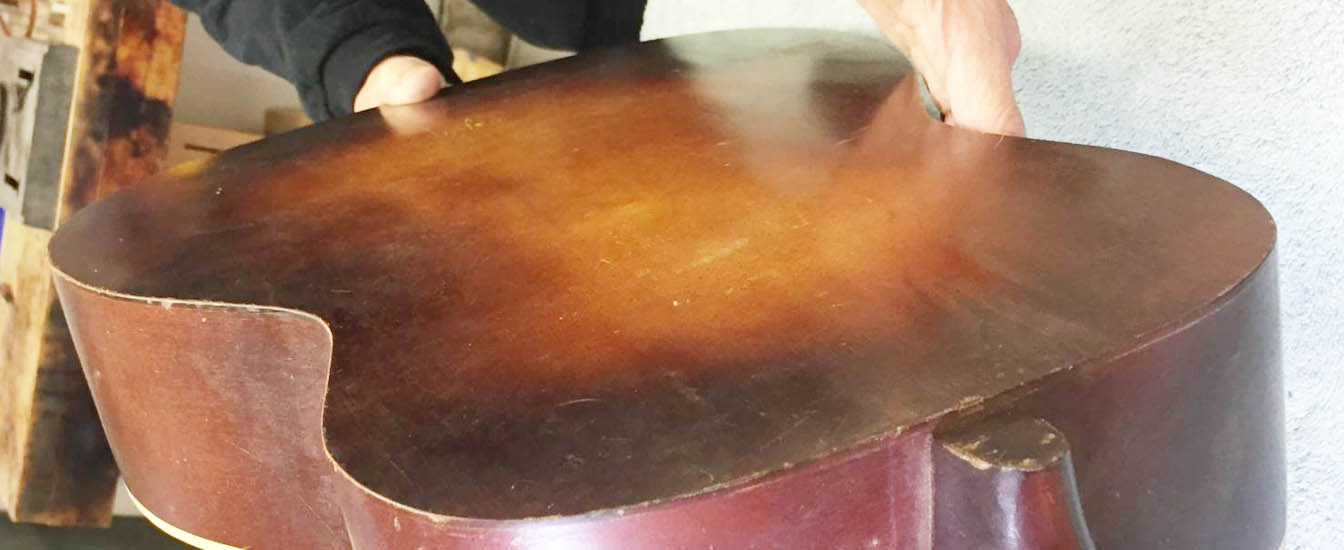
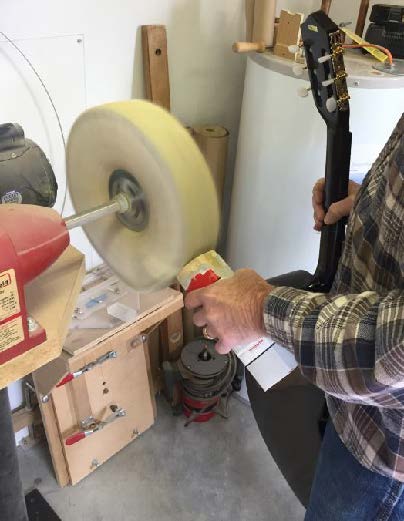
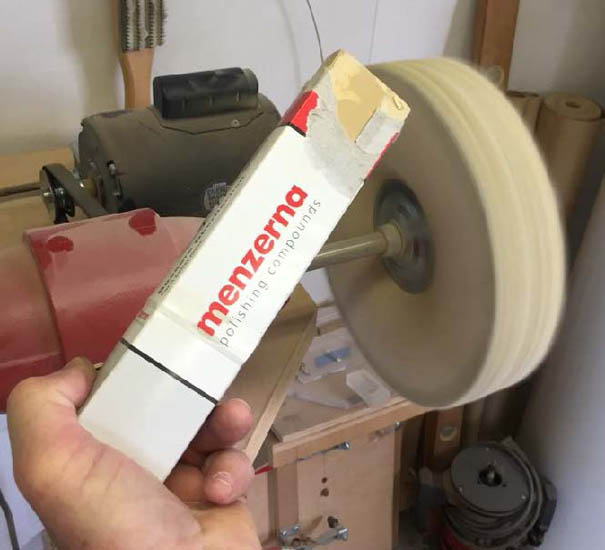
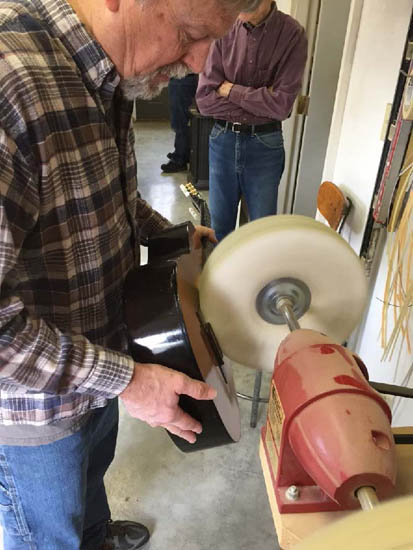
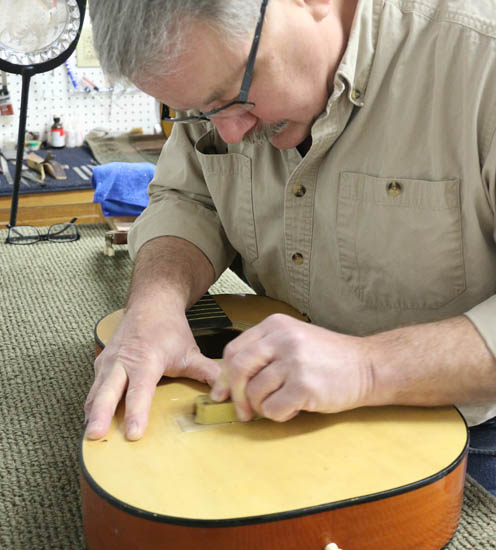
The guitar was polished using the professional quality equipment available in the shop. The buffing wheels were loaded with Menzerna polishing compound, one with medium, the other with extra fine). This polishing, while it did indeed improve the appearance of the guitar, demonstrated the limitations of polishing – it can’t be expected to correct aesthetic finish damage of any depth.
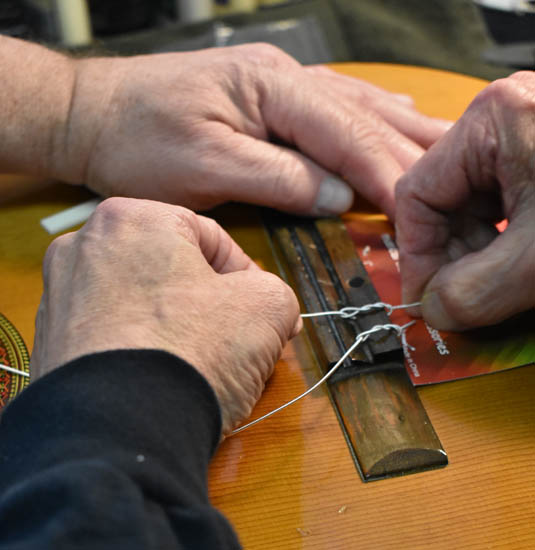
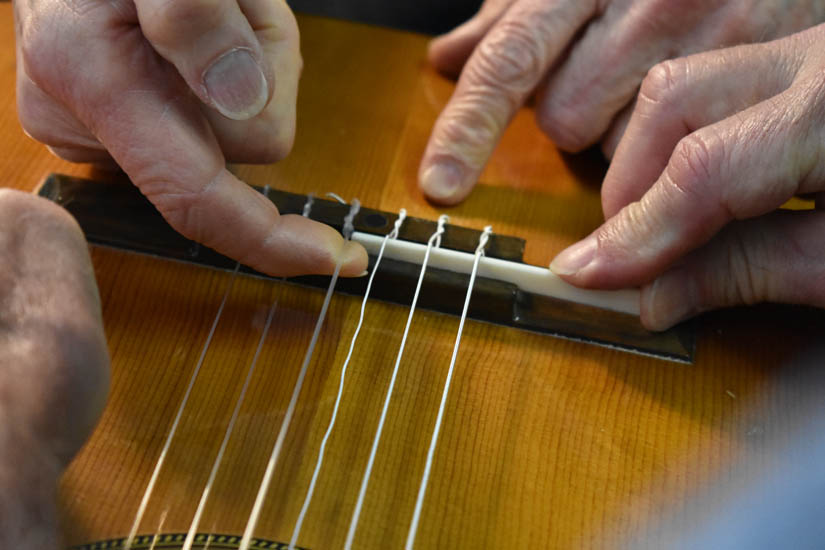
Then the saddle and nut were installed and the guitar was strung using a new set of D’Addario Pro-Arte’ EJ45 strings – typical silver plated wound clear nylon strings of normal tension.
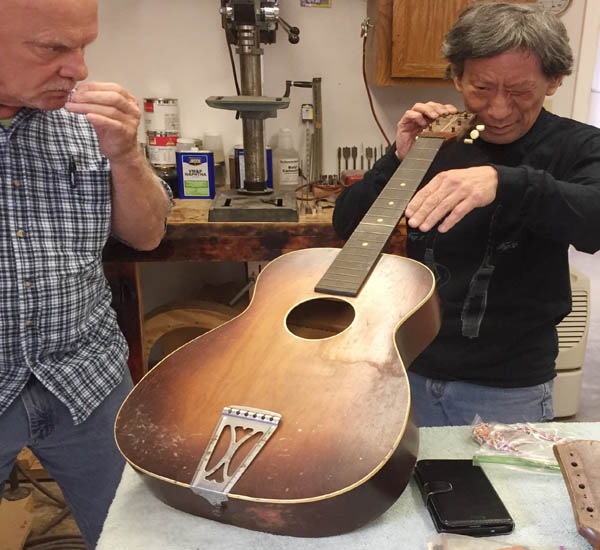
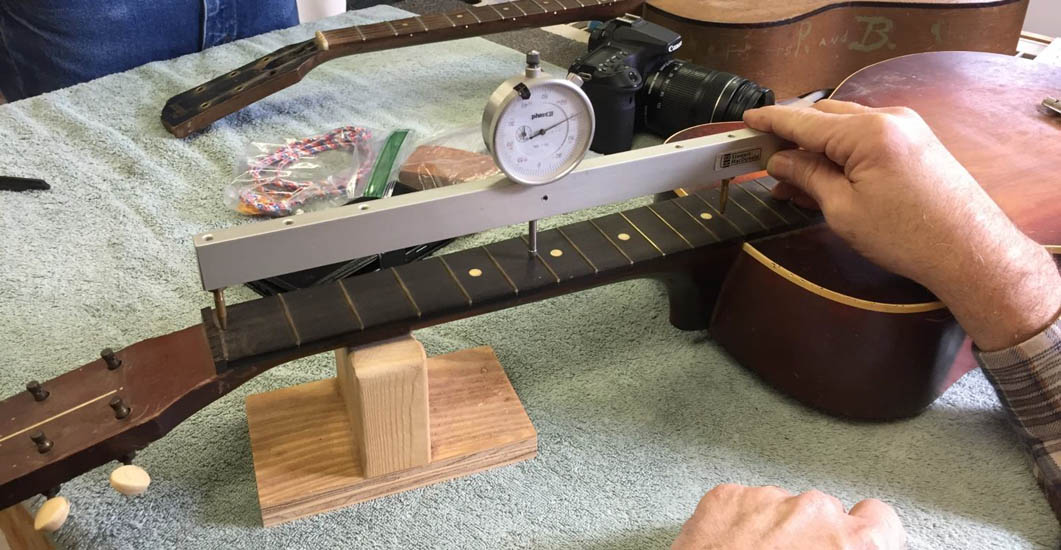
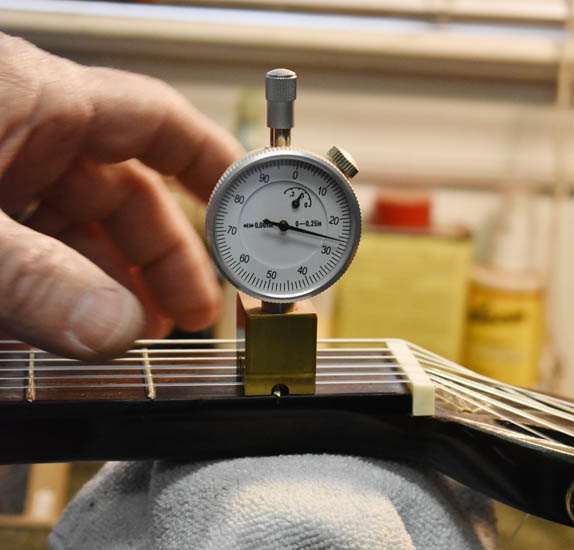
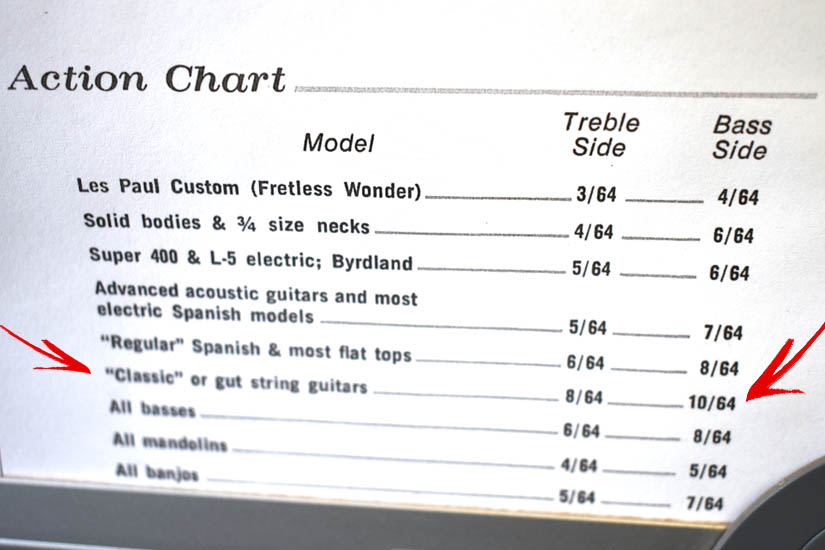
This initial stringing of the guitar resulted in action deemed too high which was an expected result. The neck relief was checked with a Stewmac Neck Relief Gauge. It was about .010" so we left it alone. Then the action was measured first using a simple metal scale and then using a StewMac Nut Slotting Gauge (dial indicator) specifically designed for measuring action. The goal was to match the Gibson spec for classical guitars posted on the shop wall – at the 12th fret Low E – 8/64”, High E – 6/64”, and so this was done. A resource for action height: www.guitaranswerguy.com/guitar-action-good-string-height/ which has an image of a StewMac action gage and also gives examples of how to use feeler gages, especially at the 1st fret.
After adjusting the nut and saddle to satisfaction the guitar was tuned to standard tuning – a challenge with fresh nylon strings.
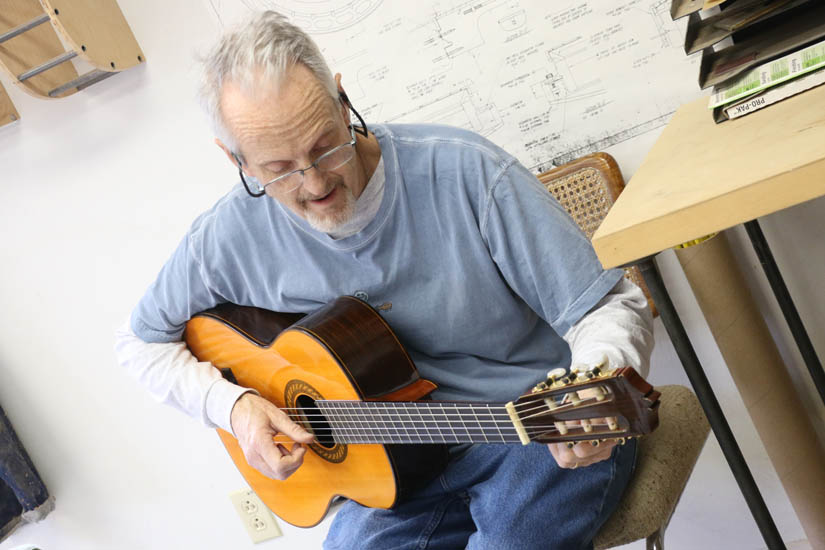
Steve Clark brought along his Sigma (by Martin) C9-R classical guitar S/N 0020 circa 1980 for comparison to the Truetone.
Below left - Truetone done. Below right - Truetone and Sigma.
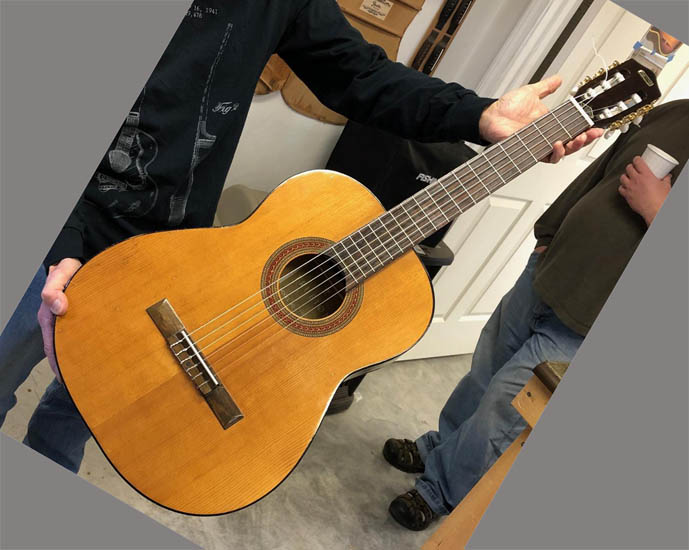
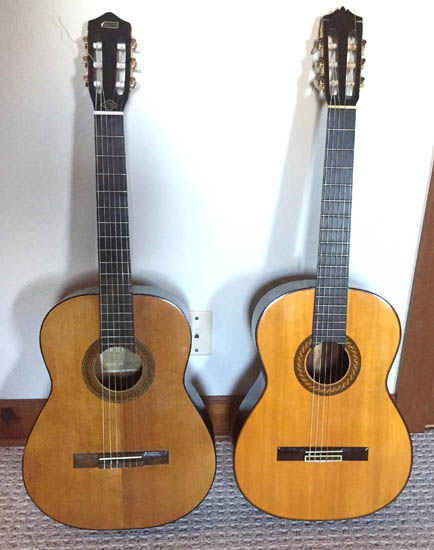
So the Sigma and Classical were tuned up and played side by side. How did they sound? The quick answer is these guitars were not that far apart in sound and playability. Note the Sigma has a solid spruce top and rosewood laminate sides and back. The construction of the Truetone is maybe uncertain but the default answer is either solid (likely) or laminate spruce top with maybe mahogany laminate sides and back.
Keep in mind that for the shop test the Sigma still had 5 really old strings. A more comprehensive test seemed compelling so Steve took the Sigma and Truetone home and continued to play them side by side in the following days – and after replacing all strings on the Sigma.
Result? There’s nothing wrong with the Truetone – an adequate student guitar at least. The Sigma seems to produce more volume and arguably a richer sound when finger picked with the same energy. The Sigma might exhibit some extra resonance for certain notes, e.g. when playing the G string at the 2nd fret – in other words its’ response is not uniform or flat or balanced for all tones – perhaps a subtle issue and not one thoroughly investigated in the comparison of these two guitars. In any case, Steve is not prepared to trade guitars based on this comparison. Both guitars will be brought to the next workshop planned on 2/15.
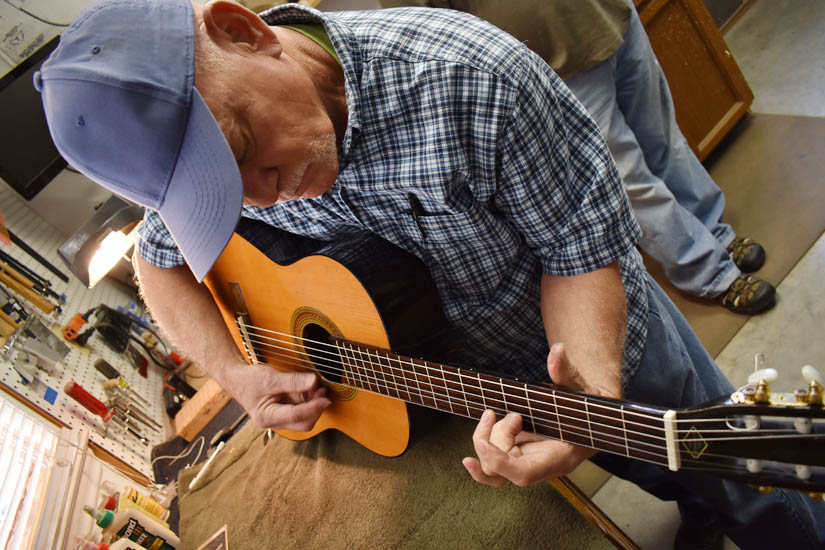
Is the Truetone finished? It has a neck dent that might be addressed. Also the action should be checked – there might be a buzz on the high E around the 3rd fret.
Harmony 3/4 size guitar bridge repair
Original assessment
Harmony, S/N or model no. H5422, circa 1980s, made in Taiwan, ¾ size parlor, light fan brace pattern,
12-fret, approx 23-1/4” scale, decal rosette, adjustable bridge saddle, slotted headstock,
bridge broken into two pieces and detached from top, two wood screws attach bridge to top
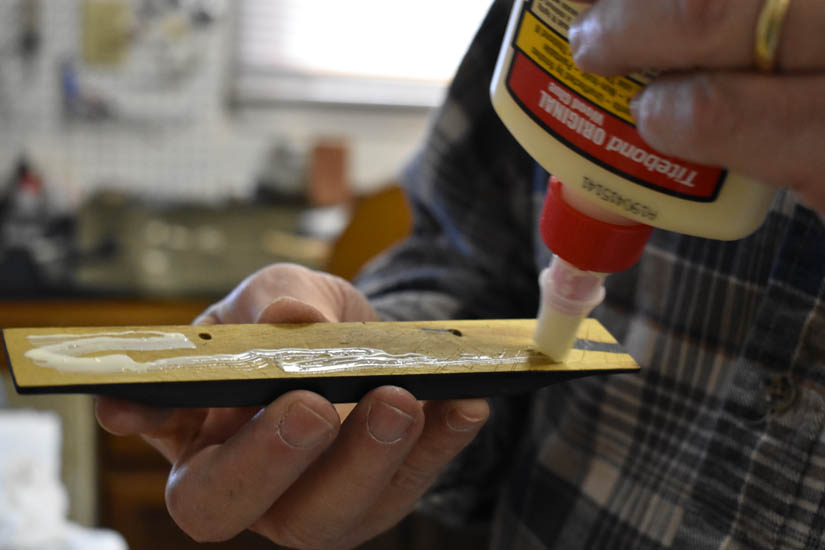
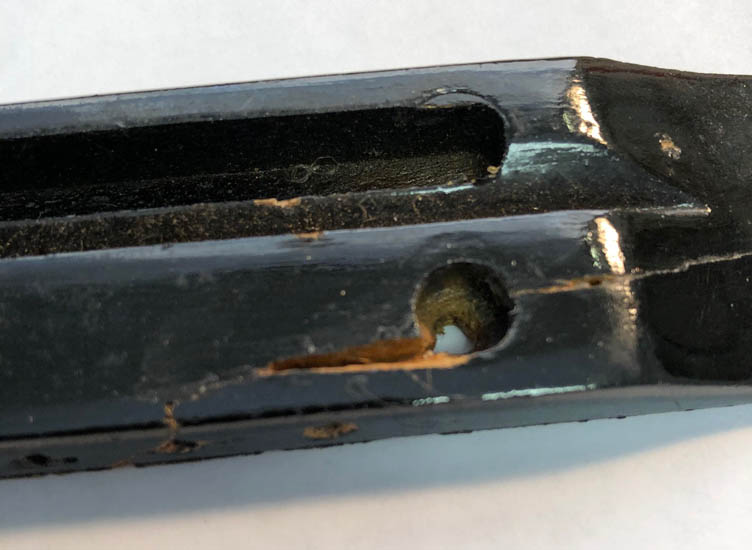
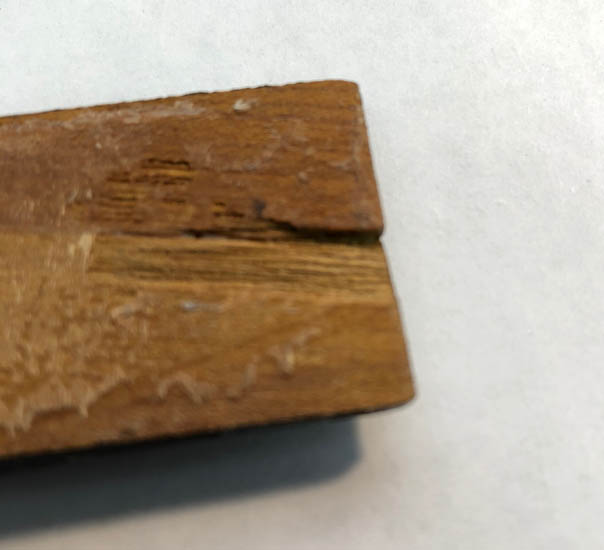
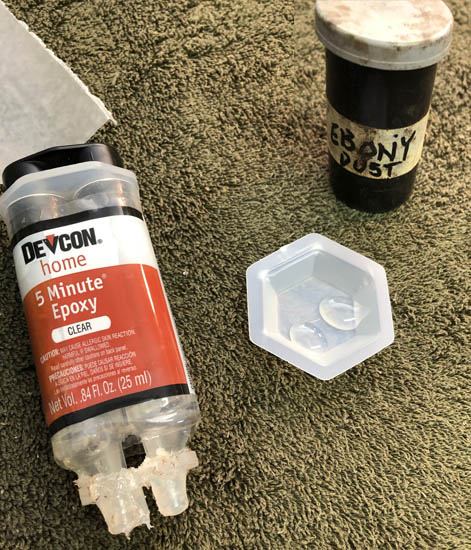
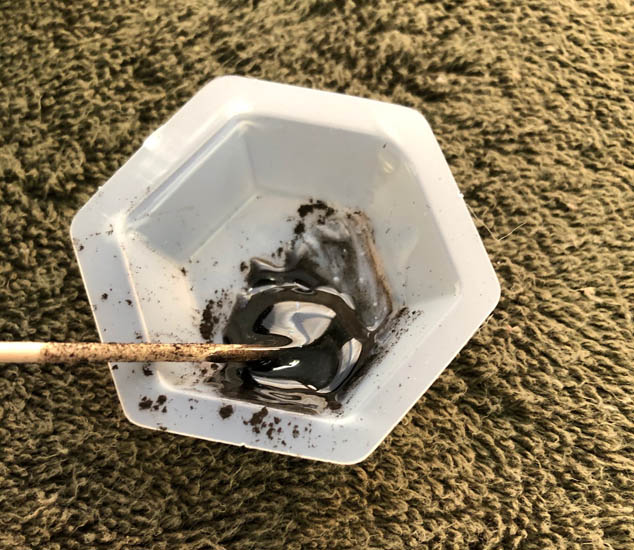
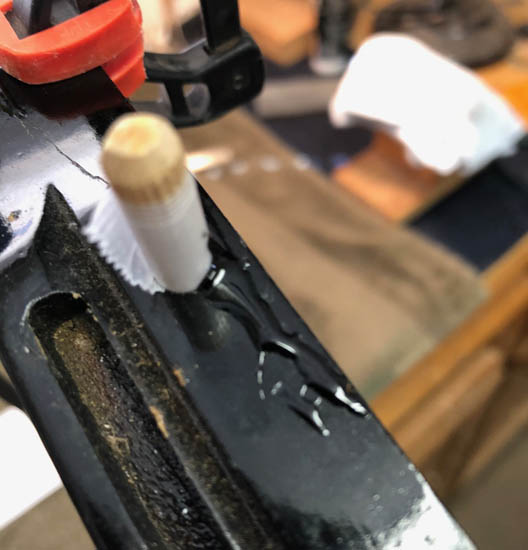
Prior to the meeting Chet did some preliminary work so the bridge would be ready for this meeting: The bridge was in 2 pieces and there were some voids where wood had chipped out. Chet mixed up epoxy and ebony dust to fill these areas. He plugged the screw hole with a dowel pin wrapped with wax paper to keep epoxy out. Photos of his work below.
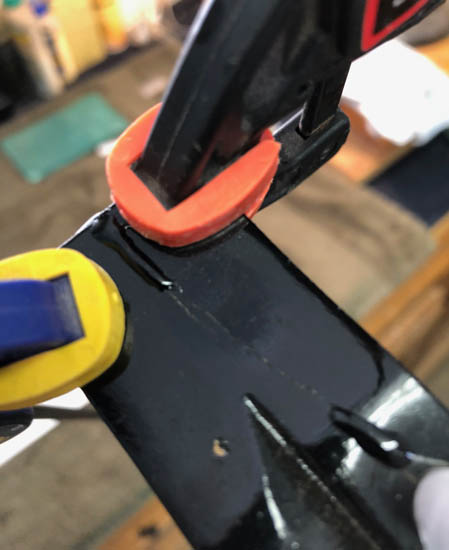
At the meeting the focus on this guitar was to finish prepping the bridge for installation, then installing (gluing) the bridge on the guitar.
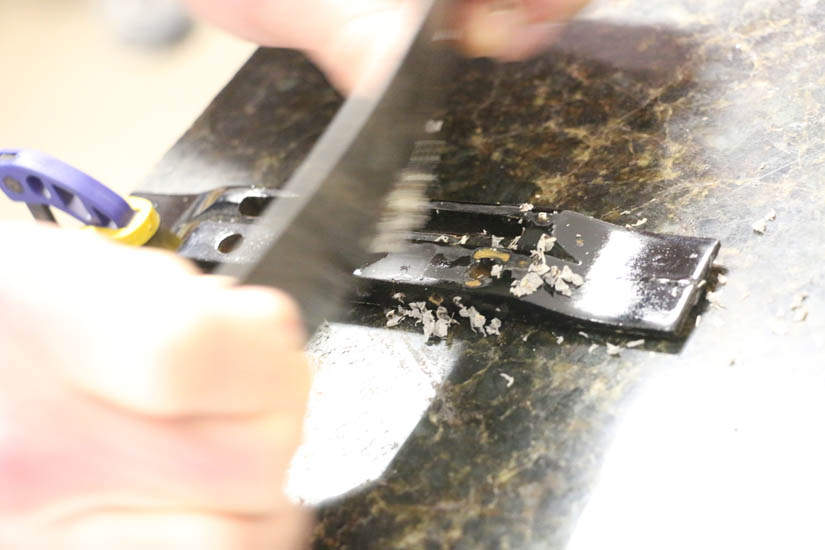
The bridge had originally been painted black so the decision was to stick with that finishing scheme. Before painting, Tom used a scraper and sandpaper to remove the excess epoxy from the repair to achieve the original geometry of the bridge. Kenny used some sandpaper covering a small block of wood to smooth the surface on the soundboard where the bridge had been removed.

The bridge was then spray painted black (with StewMac ColorTone Black Aerosol Guitar Lacquer) and left to dry. Perhaps an hour or so later it was deemed dry enough to install.
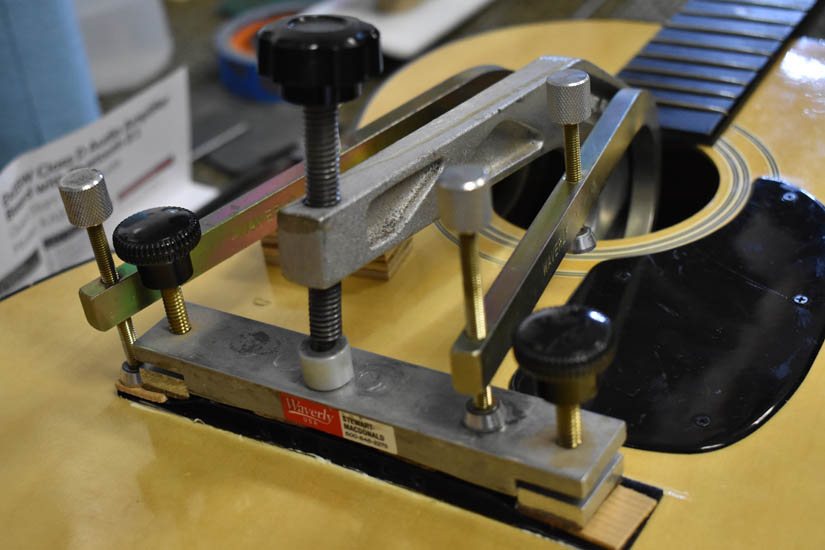
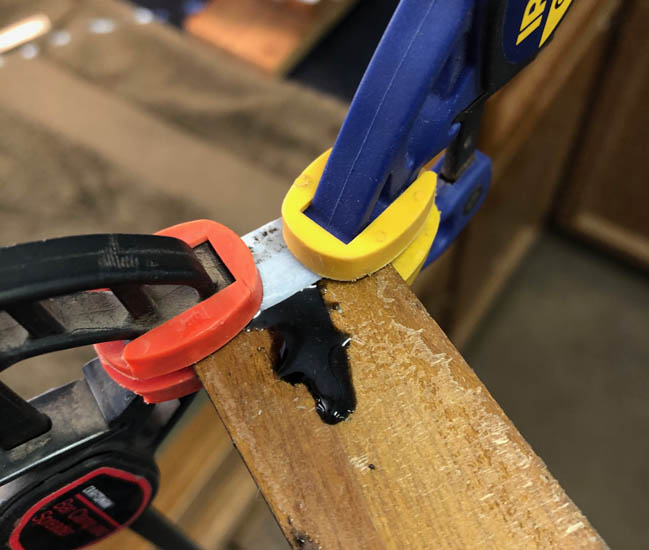
The bridge installation was “engineered” on the spot. Tools appropriate for the installation where used, yet this step illustrated the art of applying judgement when using these tools in a repair. The intention was to get the bridge to seat against the top intimately across the entire contact area – all the better to transfer string energy into the guitar. The top of the Harmony was pretty flat so leveling the bottom of the bridge produced a good fit. We used a Waveryly bridge clamp caul from StewMac and 3 sound hole clamps. These were augmented by wood shims improvised for this specific gluing to seat bridge ends. Once the fit was settled on, the bridge was glued using Original Titebond (red cap) and clamped and left to cure for the next meeting. Glue squeeze out was cleaned up.